FreePBX · Guide
Set up a FreePBX softphone on iPhone
Create a PJSIP extension, connect it to Callmar and verify outgoing, incoming and lock-screen calls one layer at a time.
Updated for Callmar 1.4 ·
What you need before starting
Write these down before opening Callmar:
- Extension username — usually the extension number from Applications → Extensions.
- Secret — the SIP password on that extension. Not the FreePBX admin password and not a UCP password.
- Public SIP server — the host phones use. Not the
/adminweb dashboard URL. - Port and transport — UDP, TCP or TLS and the PJSIP port your PBX advertises.
- Media encryption — whether this extension expects SRTP. Leave it off in Callmar unless the administrator says otherwise.
- Reachability — whether the PBX is available from mobile networks, or only on office Wi-Fi / VPN.
Callmar uses one Username field for SIP identity and authentication. If FreePBX is configured with two different values for those roles, ask the administrator for a single compatible login.
Do not confuse an extension, trunk and DID
Callmar should normally register as a PJSIP extension: one user/device identity with its own username and Secret. A SIP trunk connects the whole FreePBX system to a carrier and may be authenticated by IP or use credentials that are unsafe and unsuitable for a phone. A DID is the public number that FreePBX routes to an extension, ring group, queue or other destination.
| FreePBX object | Role in this setup |
|---|---|
| PJSIP extension | The account entered in Callmar |
| Trunk | The PBX connection to the telephone provider; do not copy its credentials into the iPhone |
| Outbound route | Decides which numbers the extension may dial |
| Inbound route / DID destination | Decides whether a public incoming call reaches this extension |
| Ring group or queue | May include the extension as one of several destinations |
This explains two common results: an extension can register without being allowed to call outside, and an outgoing call can work even though no DID or ring group points incoming calls to that extension. Diagnose those routes separately.
Prepare the FreePBX extension
In the FreePBX admin panel, open Applications → Extensions. Select an existing PJSIP extension or create a separate one for the iPhone. A separate extension makes it easier to see which device is registered and avoids one phone replacing another.
FreePBX 17 uses PJSIP as the normal path and its supported installation uses Asterisk 22 by default, where the legacy chan_sip driver is absent. Older FreePBX systems may still show both drivers. Follow PJSIP fields and documentation instead of copying a sip.conf tutorial into a modern system.
Sangoma’s official PJSIP extension guide explains the fields. That walkthrough was written for an older FreePBX GUI, so menu labels can differ in FreePBX 17; use it for field meaning rather than as an exact screenshot match. Prefer a strong alphanumeric Secret.
Record the extension number and its Secret. Review Max Contacts if the same extension already powers a desk phone: a value of one lets only one contact remain. Decide whether both devices should ring or whether the iPhone deserves a dedicated extension. Save with Submit and Apply Config before testing the new credentials.
Find the server, port and transport
The extension page does not tell you everything a remote phone needs. Ask the PBX administrator for the public SIP host name, the PJSIP port and whether the phone should use UDP, TCP or TLS. In many installations the listening transports appear under Settings → Asterisk SIP Settings, but the value the iPhone needs is the externally reachable FQDN and port, not merely the PBX’s private address.
Do not copy a URL such as https://pbx.example.com/admin into the Server field. Callmar needs only the SIP host name and port. Do not assume UDP 5060 because it is common: the PBX may expose TLS on another port or restrict UDP to the local network.
If the PBX is available only on the office network or through a VPN, say so before setup. Background incoming through the Callmar relay requires a SIP address that the relay can reach. Direct mode can still be useful for a controlled office/VPN test, but it cannot turn a private-only PBX into a public service.
Connect FreePBX to Callmar
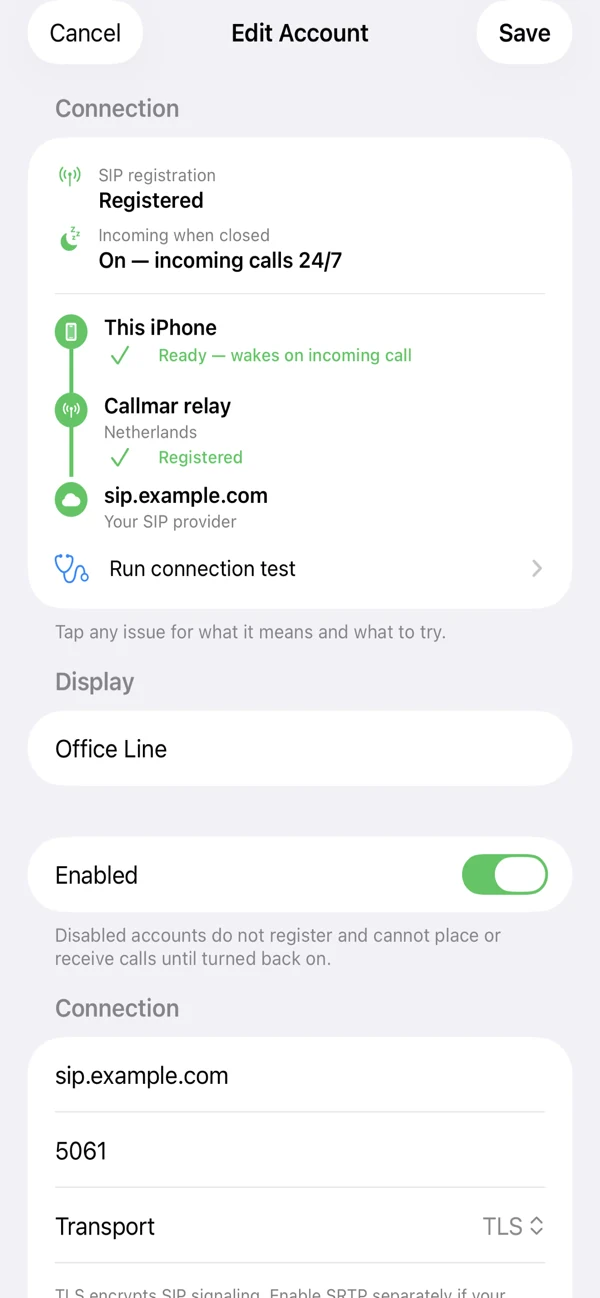
- Open Accounts, tap Add Account and choose Asterisk / FreePBX or Custom / Other.
- Enter a clear name for the line, then the public FreePBX server and PJSIP port.
- Use the extension number as Username and the Secret as Password. The Asterisk / FreePBX preset starts on UDP port 5060 with SRTP off; change those values when your PBX uses a different combination.
- Set Transport to match FreePBX. Enable SRTP Encryption only when it is enabled for this extension.
- Keep Use Callmar push relay on, choose a relay region, save and wait for Registered status.
For the shared SIP form and status meanings, see the SIP softphone for iPhone guide. If your PBX is plain Asterisk without the FreePBX GUI, use the Asterisk softphone guide.
Incoming calls and the lock screen
With the push relay on, Callmar keeps the extension reachable so an incoming FreePBX call can ring on the lock screen through CallKit, including when the app is closed. FreePBX still owns the extension, number and call routes. Live conversation audio follows the PBX, SBC or provider path.
With push relay off, the iPhone registers directly with FreePBX and can receive calls only while Callmar is running. Use that for a controlled test if needed, then turn the relay back on for normal mobile use.
After manually force-quitting Callmar, reopen it once before testing incoming notifications again. Confirm that iOS allows notifications for Callmar.
Verify the line before relying on it
Registration proves that FreePBX accepted the credentials. It does not prove that every call route and media setting works. Run these checks in order:
- Call another extension or a known outside number.
- Confirm two-way audio and the correct caller ID.
- Call the DID or route that should ring the mobile extension while Callmar is open.
- Close Callmar, lock the iPhone and repeat the incoming test.
If a later step fails, fix that layer before changing unrelated settings. Number format, inbound routes and media path are separate problems from a wrong Secret.
Use both an internal and a public incoming test. If another extension can call the Callmar extension but its DID cannot, the PJSIP contact already works; inspect the inbound route destination, ring group, queue or Follow Me list. If the DID reaches a ring group, verify that the new mobile extension is actually a member and that its ring time is long enough for the incoming path.
For outbound testing, start with an internal extension, then use the exact public number format expected by the matching outbound route. Confirm the route permits this extension and selects the intended trunk. Registration cannot grant a route that FreePBX does not already allow.
FreePBX checks for remote phones
If the account works only on office Wi-Fi, the problem is usually on the network side rather than in the iPhone form. Ask the administrator to review the public host name, firewall rules, FreePBX Firewall policy and the PBX network/NAT settings.
Do not expose SIP and media ports casually. Sangoma’s FreePBX Firewall and Responsive Firewall are designed to keep remote SIP available under controlled rules. Pair that with strong Secrets, rate limits and monitoring. A trusted office network, a known relay address range and the entire public Internet are different security zones; do not mark them all as trusted.
Under Asterisk SIP Settings, verify the External Address and Local Networks match the real topology. Those values help Asterisk advertise reachable signalling and media addresses. Confirm that the configured RTP range is allowed through the firewall in both directions. Copying another company’s NAT values can create registration that looks healthy while audio is sent to an unreachable private address.
For TLS, the certificate must match the host name entered in Callmar and must chain to a public certificate authority. An IP address may reach the PBX but still fail certificate validation when the certificate was issued for a domain name.
TLS protects signalling; SRTP protects media. They are separate settings. Enable each in Callmar only when FreePBX is configured for the same combination on this extension.
Verify the registration inside FreePBX
Use FreePBX and Asterisk evidence from the same test attempt. An administrator can open the Asterisk CLI with asterisk -rvvv, inspect the extension with pjsip show endpoint <extension>, and list registered devices with pjsip show contacts. The contact URI and availability show whether the PBX currently knows where to send an incoming INVITE.
For a short controlled capture, enable SIP messages with pjsip set logger on, reproduce one failure, then use pjsip set logger off. The normal digest sequence may include an initial 401 challenge followed by a successful authenticated REGISTER; the final response is what matters.
- No REGISTER reaches FreePBX: check DNS, public port, firewall and the selected transport.
- REGISTER ends in 403: check extension identity, Secret, source policy and Max Contacts.
- REGISTER succeeds but INVITE is absent: check outbound or inbound routing rather than changing the password.
- INVITE and 200 OK succeed but audio is missing: inspect SDP, RTP addresses, NAT and SRTP.
The Asterisk log and SIP trace can contain numbers, addresses and authentication metadata. Redact customer data and never paste a Secret into a public forum.
Fix common symptoms
Registration fails
Confirm the extension username and Secret, host, port and transport. Do not reuse the FreePBX admin password. If another phone shares the extension, review the contact limit or create a dedicated mobile extension.
Outgoing works, incoming does not
Test with Callmar open first. A failed open-app test usually means the FreePBX inbound route, ring group or follow-me target is incomplete. A failed locked-phone test points to push relay, notifications or relay reachability.
No audio or one-way audio
Check the SRTP setting in Callmar against the extension, then ask the administrator to review external address, local networks and RTP/firewall rules. Change one media setting at a time.
Calls drop after connecting
Note the exact delay. A repeatable drop near 30–32 seconds often means the ACK for FreePBX’s 200 OK did not complete the dialog through NAT. A later drop may instead point to session timers or firewall state. Capture the SIP sequence before changing codecs or reinstalling the app.
TLS or certificate errors
Use the certificate host name and the TLS port configured for PJSIP. A privately signed certificate will not satisfy Callmar’s public-trust requirement.
| Symptom | Check in Callmar | Check in FreePBX |
|---|---|---|
| Authentication failed | Extension username and Secret | The selected PJSIP extension and any separate auth username |
| Timeout / unreachable | Host, port and transport | Firewall, public DNS and whether PJSIP listens on that port |
| Registered but no outbound call | Number format | Outbound route and extension permissions |
| Incoming works only with app open | Push relay and iOS notifications | Whether the relay registration is accepted |
| One-way or no audio | SRTP setting | External address, local networks and RTP/firewall rules |
Next steps after calling works
After calling is stable, optional recording and transcription can turn Callmar calls into searchable notes on the iPhone. The feature is off by default, and recordings are not uploaded to Callmar’s servers. See the recording and transcription guide.
Callmar 1.4 can send call details and transcript text to HubSpot, Pipedrive, Zoho, Salesforce, Capsule, Sellsy or Holded. The audio recording is not sent. Test one call, check the integration status, then choose your CRM in the CRM setup guides.
Bring your own SIP line. 14-day free trial. Recording & transcription off by default.